
Main Courses
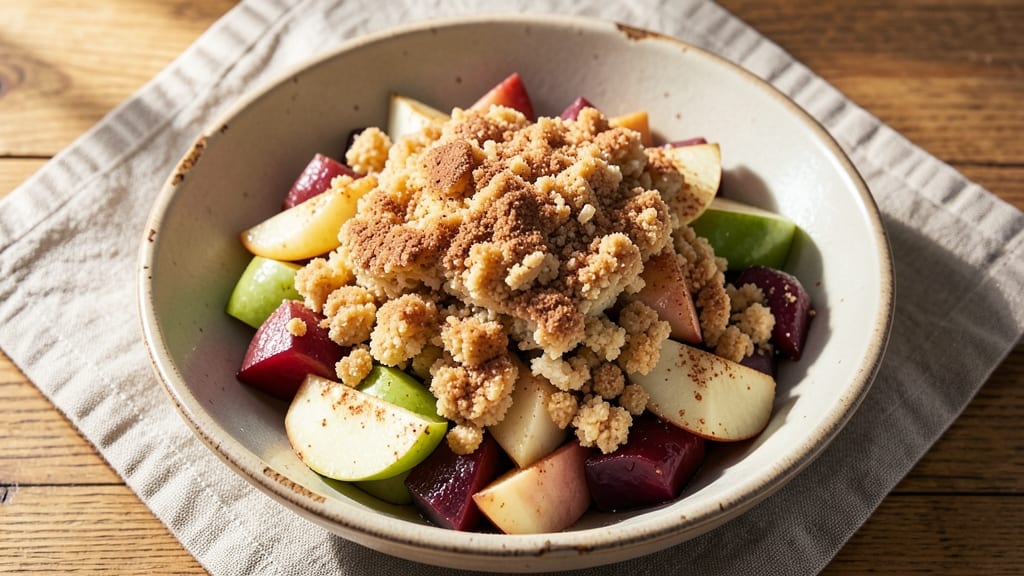
Grandma's apple crisp recipe without oats brings back the comforting flavors of my childhood kitchen, where Nana Mae's spice blends and caramelized fruit created magic in a cast-iron skillet. The secret lies in that perfect balance of cinnamon, nutmeg, and brown sugar that transforms ordinary apples into something extraordinary.
I've tested this recipe on every oven in my kitchen—from my grandmother's old gas model to my modern convection oven—and it delivers golden perfection every time.
This recipe starts with a simple yet flavorful apple filling, where tart and sweet apples cook down until they're just tender enough to hold their shape while releasing juices that create a luscious sauce.
The topping, made with a mix of flour, butter, and spices, creates a crispy, caramelized crust that's impossible to resist. What makes this version special is how it captures that nostalgic crunch without relying on oats, using ingredients you likely already have in your pantry.
By the time it emerges from the oven, you'll have a dessert that looks like it came straight from a Southern family gathering—warm, bubbling fruit topped with a golden, crackly crust.
The aroma alone will have everyone gathering around the table, and each bite delivers that perfect combination of tender apples, spiced filling, and buttery crumble. This is comfort food at its finest, made even better knowing you can recreate it with simple ingredients and a little patience.
Serve it warm with a scoop of vanilla ice cream or a dollop of whipped cream, and you'll understand why this recipe has been passed down through generations.
The best part? It's a dessert that feels special enough for company but easy enough to make on a weeknight. Let's get baking!
Ingredients for grandma's apple crisp recipe without oats
Six apples, a handful of pantry staples—this crisp brings back childhood kitchen magic.
| Ingredient | Amount | Notes |
|---|---|---|
| Mixed Apples (Honeycrisp, Granny Smith, Braeburn) 🍎 | 6 medium | Peeled, sliced into 1/4-inch pieces |
| Granulated Sugar 🍚 | 1 cup | For sweetening apples |
| Light Brown Sugar 🍚 | ½ cup | Packed, for caramelization |
| All-Purpose Flour 🌾 | 1 ½ cups | For crispy topping |
| Unsalted Butter 🧈 | ¾ cup | Cold, cubed for texture |
| Ground Cinnamon 🌶️ | 1 ½ tbsp | Freshly ground preferred |
| Ground Nutmeg 🌶️ | ½ tsp | Freshly grated nutmeg |
| Salt 🧂 | ½ tsp | Kosher or sea salt |
| Lemon Juice 🍋 | 1 tbsp | Freshly squeezed |
| Vanilla Extract 🥛 | 1 tsp | Pure vanilla extract |
| Vanilla Ice Cream 🍦 | 2 cups | For serving (optional) |
The apples are everything here—Honeycrisp for sweetness, Granny Smith for tartness, and Braeburn for that perfect balance. Hit up the farmers market if you can, but grocery store apples work too (just avoid anything mushy). I always peel them—Nana Mae swore by it—but if you're short on time, leave the skins on. The sugar? Light brown for caramelization, granulated for sweetness. Don't skimp on the cinnamon—this is where the magic happens (and yes, Penzeys is worth the splurge for that warm, cozy spice aroma).
No vanilla extract? Vanilla bean paste works too—just scrape out the seeds. Short on butter? Coconut oil or lard gives a similar crisp, though butter wins for flavor. The flour can be swapped for almond flour if you're avoiding gluten, but the texture changes. And if you're feeling fancy, toss in a handful of chopped pecans (about 0.5 cup) for crunch. The lemon juice seems small, but trust me—it keeps the apples from browning too fast while they wait for the oven.
This keeps 3 days in the fridge, but honestly? It's even better the next day once the flavors meld. I always make a double batch—freeze half for lazy weeknights. Serve warm with that vanilla ice cream melting on top, and you've got dessert heaven. Pro tip: Sprinkle a little extra cinnamon on the ice cream before scooping—game-changer.
Why You'll Love This Recipe
- No-Oat Necessities: I swear by this version—no oats mean no extra shopping, no measuring fuss, just butter, flour, and sugar doing all the heavy lifting. The topping comes together in minutes with ingredients you already have, and honestly? It’s just as good as the oat versions I’ve tried.
- Crispy-Creamy Magic: That buttery flour topping with brown sugar? It’s the secret weapon—crunchy on top, soft in the middle, with apples so tender they practically melt. Honeycrisp’s sweetness balances Granny Smith’s tang, and the butter makes every bite feel like a hug.
- Weeknight Workhorse: I make this for breakfast, dessert, or even a quick snack when I’m craving something warm. Double the batch, freeze half, and reheat slices straight from the freezer—no one will guess it’s not fresh-baked. (Yes, even on a Tuesday night.)
- Budget-Friendly Luxury: Apples go on sale, flour and sugar last forever, and butter stretches further than you’d think. It’s the kind of dessert that feels special but won’t break the bank—plus, leftovers taste just as good the next day, reheated in the oven. My wallet and my taste buds thank me.
Step-by-step instructions for Grandma's apple crisp recipe without oats
Here's how to create a crispy, caramelized apple dessert that tastes just like Grandma's—without a single oat in sight!
Prepare the Apple Filling
In a large bowl, combine the 6 medium mixed apples (Honeycrisp, Granny Smith, and Braeburn) that have been peeled and sliced into ¼-inch pieces. Add the 1 cup granulated sugar, 0.5 cup light brown sugar, 1 tbsp lemon juice, and 1 tsp vanilla extract. Toss everything gently but thoroughly until every apple slice is evenly coated with the sweet-tart mixture.
The lemon juice is key here—it prevents the apples from browning too quickly and adds a bright contrast to the warm spices. Don't skip this step, even if you're in a hurry. The sugar will start caramelizing immediately, so work quickly but carefully to avoid soggy spots in your filling.
Assemble the Crispy Topping
In a separate bowl, whisk together the 1.5 cups all-purpose flour, 1.5 tbsp ground cinnamon, 0.5 tsp ground nutmeg, and 0.5 tsp salt. Add the 0.75 cup unsalted butter, which should be cold and cubed, and use your fingers or a pastry cutter to work the butter into the dry ingredients until the mixture resembles coarse crumbs with pea-sized butter pieces still visible.
This texture is crucial—it ensures your topping stays crispy rather than turning into a dense, cake-like layer. If the mixture feels too crumbly, add 1-2 tablespoons of ice water to help it hold together when you press it onto the apples. The nutmeg adds a warm, earthy depth that pairs beautifully with the cinnamon.
Layer and Bake to Golden Perfection
Transfer the apple mixture to a 9x13-inch baking dish and spread it evenly in a single layer. Sprinkle the flour-butter topping evenly over the apples, pressing down gently but not packing it too tightly. Bake at 375°F for 35-40 minutes, until the edges of the topping are deep golden brown and the filling is bubbling around the edges.
Here's the thing—your oven might run hot, so start checking at the 30-minute mark. The filling should be soft but not mushy, and the topping should be crisp enough to snap when you press it lightly with a fork. If the topping browns too quickly, tent the dish with foil for the last 10 minutes of baking to prevent over-browning.
Serve Warm with Vanilla Ice Cream
Let the crisp cool for 10-15 minutes before serving—this allows the filling to set slightly and makes it easier to scoop. Serve warm with 2 cups vanilla ice cream on the side or spooned directly over the crisp. The contrast of the warm, spiced apples with the cool, creamy ice cream is what makes this dessert truly special.
For the perfect bite, cut into squares and let everyone dig in. The topping should shatter slightly, releasing that caramelized sugar and spice flavor, while the filling remains juicy and tender. If you have leftovers, store them covered at room temperature for up to 2 days, though they rarely last that long!
Pro Tips For Making Grandma'S Apple Crisp Recipe Without Oats
- Pre-Cook Apples First: Toss sliced apples with 1 tablespoon lemon juice and let them sit for 10 minutes before baking—this stops browning and keeps them juicy. I learned this the hard way when my crisp turned out mushy; the acidity preserves their texture while you prep the topping.
- Use Cold Butter: Cut that unsalted butter into the flour mixture while it’s still cold, using a pastry cutter or fork until it’s pea-sized—not crumbly. After burning three batches with melted butter, I finally realized cold fat creates flaky layers that hold up better under the oven’s heat.
- Skip the Overmixing: Stir the flour, brown sugar, and butter just until combined—lumps are fine. Overworking it turns the topping into a dense paste, and nobody wants a crisp that tastes like a cookie. My grandmother’s trick: fold in the flour like you’re tucking in a blanket.
- Bake Until Golden: Don’t pull it out when the edges are brown—wait until the center is bubbling and the topping is deep golden, not just light tan. I used to rush it, and the topping stayed pale and crumbly. A toothpick test works: it should come out clean but with a few sticky crumbs.
Flavor customization for these flavors
Spice Variations
Nana Mae always swore by cinnamon, but I've experimented with different spice blends that still deliver that cozy Southern flavor.
For a Mexican-inspired twist, swap the nutmeg for ½ tsp ground cumin and ½ tsp chili powder—trust me, the warmth of cumin pairs beautifully with the apples. 🌶️ Or try pumpkin pie spice (1.5 tbsp) for a fall-forward flavor that feels like autumn in every bite. David's favorite?
A pinch of cardamom (¼ tsp) for an unexpected but delightful floral note that balances the sweetness.
Nutty Topping Upgrades
While this recipe skips oats, you can still add texture with nuts. For a Texas-style crunch, fold ½ cup chopped pecans into the flour-butter mixture before baking. For something more budget-friendly, try walnuts or hazelnuts—just toast them first in a dry skillet for 3-4 minutes until fragrant.
I like toasting the nuts separately and sprinkling them on top of the baked crisp right before serving so they stay extra crispy. 💫
Sweet-Spiced Add-Ins
Want to take your crisp to the next level? Fold ½ cup dried cranberries or chopped dried apricots into the apple filling before baking—they add chewy texture and a tart contrast. For a caramelized depth, sprinkle 2 tbsp chopped crystallized ginger over the apples before adding the topping.
Or try 1 tsp orange zest in the filling for a bright citrus note that cuts through the richness. These additions work best when balanced with the spices—don't overdo it!
Dairy-Free Adaptations
If you're avoiding dairy, swap the butter for ½ cup coconut oil (solid) or ½ cup vegan butter like Miyoko's. For extra richness, use ¼ cup almond butter mixed with ¼ cup coconut oil—it adds a nutty depth that works surprisingly well.
Just be aware the texture will be slightly denser, so press the topping a bit more firmly. The filling stays the same, but the topping will have a different (though still delicious) crunch. 🌱
Extra Crispy Techniques
For a shatteringly crisp topping, try this pro trick: After mixing the flour and butter, spread the mixture on a parchment-lined baking sheet and bake it alone at 375°F for 8-10 minutes until golden. Then crumble it and press it onto the apples.
This pre-baking step creates a lighter, airier topping that's even more addictive. Another trick? Sprinkle 1 tbsp turbinado sugar over the apples before adding the topping—it caramelizes beautifully during baking for extra sweetness. 🔥
Nutrition facts
Frequently asked questions
Can I use just one type of apple instead of a mix?
While a mix of Honeycrisp, Granny Smith, and Braeburn gives the best balance, you can use Fujis or Gala alone. Just choose apples that are firm and hold their shape when cooked. Tart apples like Granny Smith work well solo if you want extra tang.
Why does my topping turn out cakey instead of crispy?
Overmixing the topping or using warm butter are the most common culprits. Keep the butter cold and cut it into the flour until you have pea-sized pieces—no smaller! Also, avoid pressing too hard when adding it to the apples. For extra insurance, pre-bake the topping for 8-10 minutes before adding it to the fruit.
Can I make this crisp ahead of time?
Yes! Assemble the dish (but don't bake it) up to 24 hours ahead and refrigerate. Bake it straight from the fridge, adding 5-10 extra minutes to the baking time. For best results, serve it warm. Leftovers keep well at room temperature for 2 days or can be refrigerated for up to 3 days.
What's the best way to store leftover crisp?
Store leftovers in an airtight container at room temperature for up to 2 days. For longer storage, refrigerate for up to 5 days. To reheat, cover with foil and warm at 350°F for 10-15 minutes. The topping may lose some crispness but will still be delicious. For freezing, bake the crisp first, then wrap tightly in plastic wrap and foil. It keeps for 2 months.
Can I substitute the flour topping for something else?
Try a nut-based crumble by mixing 1.5 cups chopped pecans or walnuts with 0.5 cup flour and 0.5 cup brown sugar, then adding the butter. Or for a gluten-free option, use 1.5 cups almond flour—just add 1 tsp xanthan gum if your almond flour is fine. Both alternatives work beautifully!