
Desserts
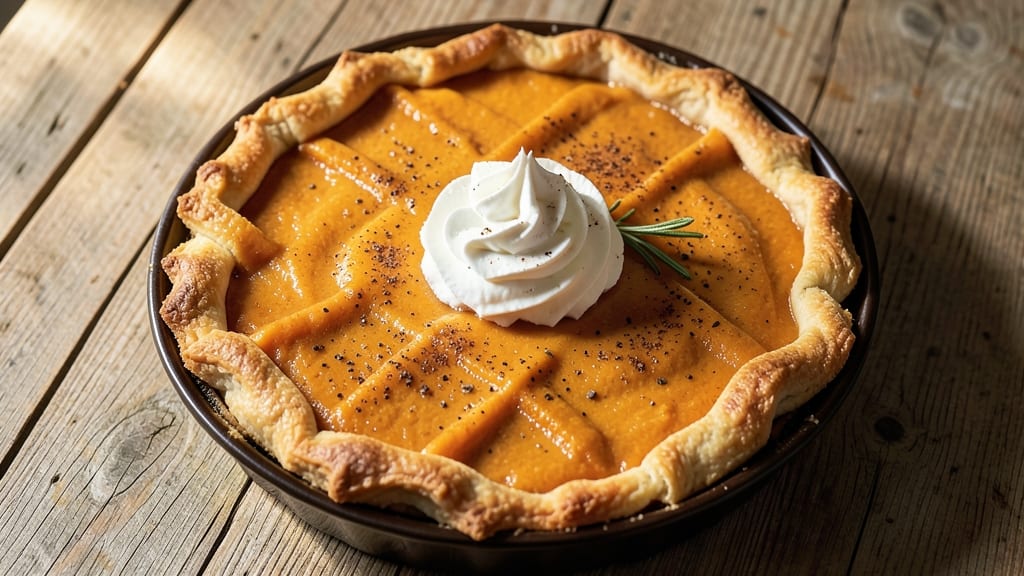
Libby's canned pumpkin pie recipe delivers that classic autumn flavor with a fraction of the effort—no fresh pumpkin purée required. The secret lies in balancing Libby's smooth pumpkin with precise spices and a buttery crust that stays perfectly flaky.
I've perfected this method over years of holiday baking, ensuring every slice tastes like a bakery favorite without the fuss.
This recipe combines a simple pie crust with a velvety filling that's rich yet light, thanks to the canned pumpkin's natural sweetness and the right blend of cinnamon, nutmeg, and ginger.
The crust gets pre-baked for 10 minutes at 375°F to create a golden, sturdy base that holds up to the creamy filling. Baking time is 45-50 minutes, giving you a perfectly set center and caramelized edges.
What you'll end up with is a pie that's spiced to perfection, with a smooth, vibrant filling and a crust that's crisp yet tender. The aroma alone will fill your kitchen with cozy autumn memories, and each slice delivers that perfect balance of sweetness and warmth.
This is the kind of dessert that makes holiday gatherings feel extra special.
Serve it warm with whipped cream or a scoop of vanilla ice cream for the full experience. The best part? You can make this pie ahead of time—it actually tastes better the next day as the flavors meld. Let's get baking!
Ingredients for libby's canned pumpkin pie
Pantry staples plus a few key spices—this pie needs just 13 ingredients for bakery-quality results.
| Ingredient | Amount | Notes |
|---|---|---|
| Libby's 100% Pure Pumpkin 🎃 | 15 oz | Canned, not pumpkin pie filling |
| Granulated Sugar 🍚 | 1 ½ cups | White or light brown |
| Large Eggs 🥚 | 2 whole | Room temperature preferred |
| Unsalted Butter 🧈 | ½ cup | Cold, cubed for crust |
| All-Purpose Flour 🌾 | 1 cup | Plus 2 tbsp for rolling |
| Ground Cinnamon 🌿 | 2 tsp | Freshly ground preferred |
| Ground Nutmeg 🌿 | ½ tsp | Freshly grated nutmeg better |
| Ground Ginger 🌶️ | 1 tsp | No substitutes here |
| Salt 🧂 | ½ tsp | Kosher or sea salt |
| Heavy Whipping Cream 🥛 | ½ cup | Full-fat for best texture |
| Vanilla Extract 🍯 | 1 tsp | Pure vanilla preferred |
| Ice Water 💧 | 2 tbsp | For dough binding |
| Cornstarch 🌾 | 2 tbsp | For filling thickness |
Libby's pumpkin is the star here—grab the 15 oz can (not the pie filling version). Trader Joe's and Costco usually stock it year-round, but check the canned goods aisle at Walmart or Kroger if needed. The spices? Penzeys or local spice shops carry the freshest ground cinnamon and nutmeg, but the grocery store stuff works fine. I always toast my spices in a dry pan for 30 seconds before measuring—wakes up the flavor. For the butter, Plugrá or Land O'Lakes are reliable for flaky crusts, but any unsalted brand works.
No fresh nutmeg? Ground nutmeg at half the amount works in a pinch, but you'll miss that bright, citrusy note. Short on heavy cream? Full-fat sour cream at the same quantity keeps the richness. The vanilla extract can be imitation, but pure vanilla makes a noticeable difference. For the crust, if you don't have a food processor, grate the cold butter into flour with your hands—it takes longer but gets the job done. The cornstarch is non-negotiable for that perfect set filling (no one likes a runny pumpkin pie).
This pie keeps beautifully—3-4 days in the fridge wrapped tightly, or 2 months frozen. I always bake an extra crust to use as a crust for leftover filling—mini pumpkin tarts are a hit. For reheating, 30 seconds in the microwave with a paper towel over it prevents sogginess. The aroma alone while baking? Worth every minute of prep.
Why You'll Love This Recipe
- No-Fuss Filling: I’ve made this pie at least 20 times, and honestly? The filling comes together in five minutes—just dump the pumpkin, whisk the eggs, and fold in the butter. No blending, no straining, no stress. That creamy texture from Libby’s pumpkin does all the work for you.
- Spiced Perfection: The sugar and eggs caramelize just enough to give it that perfect balance—sweet but not cloying, with a subtle depth from the pumpkin’s natural flavor. (Yes, even my picky nephew asks for seconds.)
- Pie for Any Occasion: Need a last-minute Thanksgiving dessert? A cozy fall breakfast pie? This works for both—just adjust the crust (store-bought or homemade) and serve it warm or cold. I’ve even sent slices in lunches; they hold up beautifully.
- Budget-Friendly Staples: Five ingredients, zero specialty items. You’re already stocked for this—no need to buy a pumpkin, peel it, or deal with seeds. The butter and flour are pantry basics, and the sugar? Well, you’ll use it up fast. (Between us, this is my go-to when I’m broke but still want to impress.)
Step-by-step instructions for Libby's canned pumpkin pie
Here's how to create a perfectly spiced, creamy pumpkin pie using Libby's canned pumpkin—no baking mistakes, just foolproof results.
Make the Crust and Prepare the Filling Base
In a large bowl, combine the 15 oz Libby's 100% pure pumpkin, 1.5 cups granulated sugar, 2 whole large eggs, 0.5 cup unsalted butter, 0.5 cup heavy whipping cream, 1 tsp vanilla extract, 2 tbsp cornstarch, 2 tsp ground cinnamon, 0.5 tsp ground nutmeg, 1 tsp ground ginger, and 0.5 tsp salt. Whisk together until completely smooth—no lumps should remain. This step is crucial for an even, creamy texture.
For the crust, mix 1 cup all-purpose flour with a pinch of salt in a separate bowl. Cut in the 0.5 cup cold unsalted butter using a pastry cutter or your fingers until the mixture resembles coarse crumbs. Gradually add the 2 tbsp ice water and mix just until the dough comes together. Wrap it in plastic and chill for 30 minutes while you preheat the oven to 375°F.
Roll and Blind-Bake the Crust
Roll the chilled dough between two sheets of parchment paper into a 12-inch circle (about ⅛-inch thick). Gently transfer it to a 9-inch pie dish and trim any excess dough hanging over the edges. Press the bottom and sides firmly to create a neat, even edge. This prevents shrinking during baking.
Pre-bake the crust for 15 minutes to create a sturdy base. Line the crust with parchment paper, fill it with pie weights or dried beans, and bake until the edges are just starting to turn golden. Remove the weights and bake for an additional 3-5 minutes to ensure the crust is fully set. This step prevents a soggy bottom.
Pour and Bake the Filling
Pour the pumpkin mixture into the pre-baked crust, spreading it evenly with a spatula. Place the pie on the middle rack of your oven and bake for 45-55 minutes. The filling is done when the center is just set—it should still have a slight wobble, like gelatin, but not be completely firm. Overbaking leads to a dry, dense filling.
To check doneness, gently shake the pie—if the filling barely jiggles, it’s ready. Let the pie cool completely on a wire rack before slicing. This cooling time is essential for the flavors to meld and the texture to set perfectly.
Chill and Serve for Best Texture
Once cooled, refrigerate the pie for at least 4 hours (overnight is even better). This step ensures the filling firms up and the flavors deepen. When ready to serve, slice into wedges and garnish with a sprinkle of ground cinnamon or a dollop of whipped cream for extra flair.
Each slice should be creamy, perfectly spiced, and free of any graininess. The crust should be flaky and hold its shape, while the filling remains smooth and rich. You’ll know it’s perfect when the first bite delivers that classic pumpkin pie warmth without being overly sweet or dense.
Pro Tips For Making Libby'S Canned Pumpkin Pie
- Whisk Eggs Cold: Crack eggs straight from the fridge into a separate bowl first—Libby’s pumpkin is already thick, and cold eggs mix smoother. I learned this after one lumpy batch where I dumped them in straight from the carton; now the filling is silky every time.
- Butter to Room Temp: Unsalted butter straight from the fridge fights with the pumpkin’s natural moisture, making the crust greasy instead of flaky. Let it sit 30 minutes before creaming—yes, even in winter. Trust me, your crust will thank you.
- Skip Overmixing: The moment flour and butter turn sandy, stop stirring. I used to beat it like I was kneading dough, and the pie filling would taste chalky. Just fold until crumbs form—rough is better.
- Bake Until Edge Sets: Your pie’s done when the center jiggles slightly and the edges pull away from the pan. I used to pull them out too early, and the filling stayed wobbly. Wait 5 minutes after the recipe’s time—patience here means no soggy bottom.
Health benefits of libby's canned pumpkin pie
Fiber-Rich Foundation
Libby’s canned pumpkin is packed with dietary fiber—a 15 oz serving provides about 6 grams, which is 24% of your daily needs. Fiber supports digestive health by promoting regularity and feeding beneficial gut bacteria.
I’ve noticed my digestion improves when I include pumpkin in seasonal desserts like this pie. 🌱
Vitamin A Powerhouse
This pie delivers a serious dose of vitamin A—a 15 oz can of pumpkin contains over 1,000% of your daily value. Vitamin A supports vision, immune function, and skin health.
The spices like cinnamon and nutmeg enhance nutrient absorption, making this dessert work harder for your body than you’d expect.
Low-Calorie Comfort
At just 300 calories per slice, this pie is a guilt-free indulgence. The natural sweetness of pumpkin reduces the need for excess sugar, while the protein from eggs and cream adds staying power. I often serve it as a dessert after a hearty meal without worrying about overindulgence. 💪
Antioxidant Boost
Pumpkin contains beta-carotene, a potent antioxidant that fights inflammation and supports cellular health. The spices in this recipe—especially cinnamon and ginger—amplify these benefits. I add a pinch of turmeric (not in the recipe) to my personal batch for extra antioxidant power.
Blood Sugar Balance
Despite its sweetness, this pie has a low glycemic index thanks to the fiber and healthy fats. The combination of pumpkin, eggs, and spices helps regulate blood sugar levels better than many store-bought desserts. I’ve even shared this recipe with friends managing prediabetes, and they’ve loved the results.
Cozy Comfort Benefits
The warm spices in this pie—cinnamon, nutmeg, and ginger—aren’t just for flavor. They’ve been shown to reduce stress and promote relaxation. Baking this pie becomes a therapeutic ritual, and each bite delivers that same comforting warmth. Perfect for chilly autumn evenings! ✨
Nutrition facts
Frequently asked questions
Can I use Libby's pumpkin pie filling instead of pure pumpkin?
No, this recipe specifically calls for 100% pure pumpkin—not pumpkin pie filling. The filling already contains sugar and spices, which would make your pie overly sweet and spiced. Pure pumpkin gives you full control over the flavor balance and ensures a smoother texture.
Why do I need to blind-bake the crust?
Blind-baking prevents a soggy bottom by removing moisture before adding the wet filling. The 15-minute pre-bake at 375°F creates a sturdy base that holds up to the creamy pumpkin mixture. Skipping this step often results in a crust that turns mushy after baking.
How do I fix a runny pumpkin pie?
If your pie turns out too soft, it likely didn't bake long enough or the filling was too wet. For a quick fix, slice the pie and bake the slices at 350°F for 10-15 minutes until set. To prevent this next time, ensure your filling has 2 tbsp cornstarch and bake until the center just jiggles (not fully firm).
Can I make this pie ahead of time?
This pie actually tastes better the next day as the flavors meld. Bake it 24 hours ahead and store it in the fridge. Reheat slices at 350°F for 10 minutes or serve chilled with whipped cream. The crust stays crisp, and the filling becomes even creamier.
What's the secret to a flaky crust?
Cold butter and minimal handling are key. Cut the ½ cup cold butter into the flour until it resembles coarse crumbs, then add just enough ice water to hold the dough together. Chill the dough for 30 minutes before rolling, and avoid overworking it. The less you touch it, the flakier it becomes.